Ever tried layering foundation only to end up looking more like a cake than a masterpiece? Yeah, we’ve all been there. But what if I told you the secret to professional-level makeup lies in the art of makeup layering techniques?
In this post, we’ll dig deep into the world of makeup layering techniques—starting from why they matter, how to nail them step-by-step, and expert tips sprinkled throughout for good measure. And yes, there’s even some rant-worthy pet peeves hidden inside!
By the end of this article, you’ll have learned:
- The basics and importance of makeup layering
- Actionable steps to master these techniques like a pro
- Expert best practices that’ll make your canvas glow
- Real-world case studies to inspire your next look
Table of Contents
- Key Takeaways
- Why Makeup Layering Matters
- Step-by-Step Guide to Mastering Makeup Layering
- Best Practices for Flawless Results
- Examples & Inspiration
- FAQs About Makeup Layering Techniques
Key Takeaways
- Crafting layers is essential for dimension and longevity in your makeup look.
- Start with a primer; it sets the stage for everything else.
- Layer products strategically—not all at once—for blending perfection.
- Blend, blend, BLEND—it’s not just a mantra; it’s survival.
- Dry versus wet application varies depending on your finish goals.
Why Makeup Layering Matters
Let me confess something embarrassing—I used to think applying heavier coverage meant better results. One unfortunate day, I layered an entire stick of concealer onto one spot (yes, seriously). Cue flashback nightmare material.
Turns out, makeup layering isn’t about slapping things on haphazardly. Instead, it involves strategic placement and controlled product usage. When done right, these techniques enhance facial features without suffocating skin or creating dreaded “cake face.”
“Optimist You: This will be easy!”
Grumpy You: “Only if you bring snacks AND coffee.”
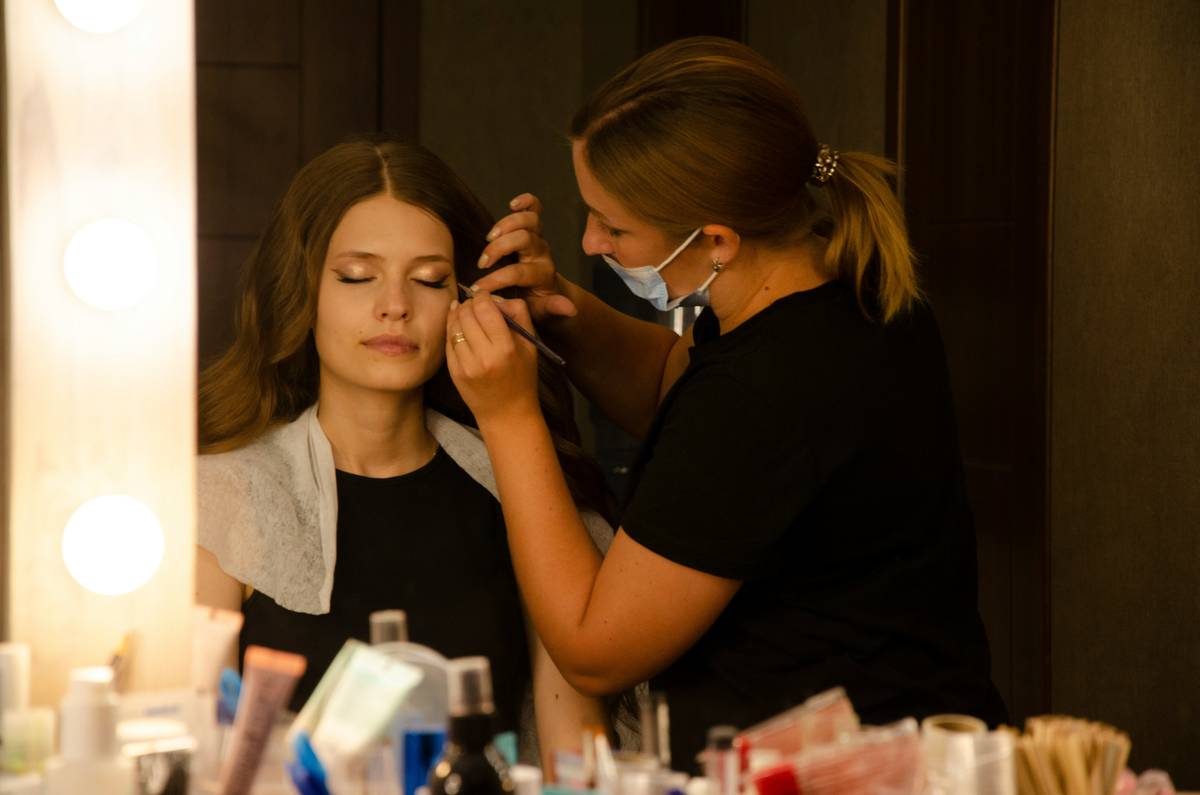
Step-by-Step Guide to Mastering Makeup Layering Techniques
Step 1: Prep Your Canvas
Achieving flawless makeup starts with prepping your skin properly. Always cleanse, tone, moisturize, and prime before diving into cosmetics.
Step 2: Start Light and Build Gradually
Begin with lighter shades and thin applications. For example, use sheer foundations or tinted moisturizers as base layers. Once set, add buildable formulas where needed.

Step 3: Target Areas That Need Extra Coverage
Spot apply thicker consistencies around trouble zones such as blemishes or under-eye circles—but don’t overdo it here either! Subtlety wins every time.
Best Practices for Flawless Results
- Use the Right Tools: Sponges, brushes, fingers? Choose wisely based on desired effects.
- Mix Textures Wisely: Matte paired alongside dewy finishes can elevate looks instantly.
- Set Strategically: Translucent powders help lock layers together without adding extra bulk.
P.S., avoid overloading products on oily T-zones—it’s honestly THE WORST.
Examples & Inspiration
Case Study Alert! Meet Sarah, who transformed her evening routine by adopting our foolproof makeup layering method:
“Before, doing my face would feel clunky and heavy…until I discovered layering tricks shared here which saved hours AND boosted confidence.”
FAQs About Makeup Layering Techniques
Can Beginners Nail These Techniques Easily?
Absolutely! With patience—and maybe tutorials—you’ll get there too!
Is Primer Necessary Before Starting Layers?
Hell yeah—it smooths texture unevenness while gripping subsequent coats effectively.
What’s the Biggest Mistake People Make?
No blending + mismatching undertones = instant chaos alert!
Conclusion
There you have it—an ode to mastering those coveted makeup layering techniques. Remember though:
Optimist You: Follow these tips religiously!”
Grumpy You: Fine…but let’s hope caffeine fuels this artistic journey.”
Stay radiant, beauties!
Like flipping through your old Glamour magazine stash, practice makes perfect…just keep brushing up on those skills!