Ever stared at your makeup bag, overwhelmed by brushes and palettes, wondering how professional artists make it look so effortless? Spoiler alert: it’s not just talent—it’s technique. Whether you’re prepping for a big event or leveling up your daily glam game, mastering expert makeup application can feel daunting. But don’t worry; we’ve got your back (and your face).
In this guide, you’ll discover everything from choosing the right tools to nailing advanced techniques that scream “pro.” By the end of this post, you’ll have actionable steps to transform your makeup routine into an art form.
Table of Contents
- Why Expert Makeup Application Matters?
- Step-by-Step Guide to Flawless Application
- Tips & Best Practices for Expert Makeup
- Real-World Examples of Expert Techniques
- FAQs About Expert Makeup Application
Key Takeaways
- Understanding the importance of proper tools and skincare prep is essential for expert-level results.
- A step-by-step approach ensures even beginners can achieve polished looks.
- Common mistakes, like overblending or skipping primer, can ruin your finish—avoid them!
- Case studies show how small tweaks in technique lead to dramatic improvements.
Why Expert Makeup Application Matters?
Let’s talk about why getting expert makeup application right is more than just vanity. A well-applied face does wonders for confidence, whether you’re walking into a meeting or hitting the red carpet. But here’s something most people mess up on:
Confessional Fail: Once, I tried contouring without blending properly. The result? My cheekbones looked like two muddy streaks across my face—definitely not the “snatched” look I was aiming for.
Rant time: Nothing screams amateur louder than clumpy mascara or cakey foundation. Seriously, folks—if you’re going to layer products, blend like your life depends on it.

Step-by-Step Guide to Flawless Application
“Optimist You:” *’Follow these tips!’*
“Grumpy You:” *’Ugh, fine—but only if coffee’s involved.’*
Alrighty then, let’s dive in:
Step 1: Prep Like a Pro
Start with clean, moisturized skin. Use a primer tailored to your skin type—it smooths out pores and helps makeup stay put longer.
Step 2: Perfect Your Base
Apply foundation using a damp beauty sponge or brush for seamless coverage. Don’t forget to blend down your neck to avoid harsh lines!
Step 3: Contour and Highlight
Use cream or powder formulas to sculpt your features. Blend gently under cheekbones, jawline, and nose for dimension.
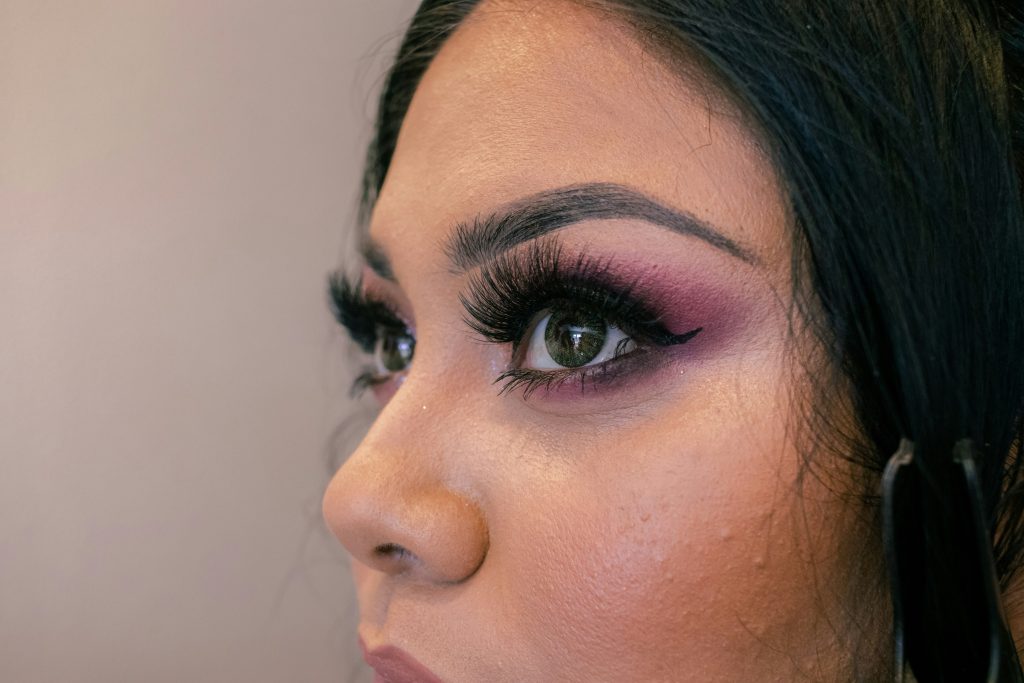
Step 4: Eyes That Pop
Prime lids before eyeshadow to prevent creasing. Layer shades strategically and smudge eyeliner for sultry vibes.
Step 5: Finish Strong
Set everything with translucent powder. Add blush, mascara, and lipstick for that final wow factor.
Tips & Best Practices for Expert Makeup
- Clean brushes regularly—bacteria buildup is nasty business.
- Invest in quality products; cheap stuff often flakes or fades fast.
- Blend, blend, BLEND! It’s non-negotiable.
- Terrible Tip Disclaimer: Avoid piling on too much product. Less = more.
- Practice regularly—expertise comes with repetition.
Real-World Examples of Expert Techniques
Take Sarah, a self-taught makeup artist who went viral after perfecting her cut crease technique. She shares that consistent practice and investing in good brushes made all the difference. Her before-and-after photos are proof enough!
FAQs About Expert Makeup Application
Q: How long does it take to master expert makeup application?
A: It varies, but consistency pays off within weeks. Practice different styles daily!
Q: Do I need expensive tools to achieve professional results?
A: Not necessarily, though some investments (like a decent set of brushes) are key.
Q: What’s the biggest mistake beginners make?
A: Overdoing it. Start light—you can always add more!
Conclusion
You now know the ins and outs of expert makeup application, from prep work to nailing those finishing touches. Remember: practice makes progress. So grab your tools, channel your inner artist, and get blending!
Here’s a little throwback inspiration: “Like baking cookies, great makeup takes patience—and sometimes burnt edges.” 🍪✨