Ever spent hours perfecting your makeup only to see every pore highlighted in HD photos? Yeah, us too.
In this guide, you’ll discover how to create flawless makeup for HD photography that looks as good on camera as it does in real life. From choosing the right products to applying them like a pro, we’ve got you covered!
Table of Contents
- Introduction
- Key Takeaways
- The Problem with Regular Makeup for HD Cameras
- Step-by-Step Guide to HD-Friendly Makeup
- Pro Tips for Flawless Results
- Case Studies and Examples
- FAQs About Makeup for HD Photography
- Conclusion
Key Takeaways
- HD cameras expose imperfections—use high-definition-friendly products.
- Foundation should be lightweight but buildable for seamless coverage.
- Blending is non-negotiable; harsh lines are unforgiving on camera.
- Powder wisely to avoid the dreaded “cake face” effect.
- Matte finishes work best under bright studio lights.
The Problem with Regular Makeup for HD Cameras
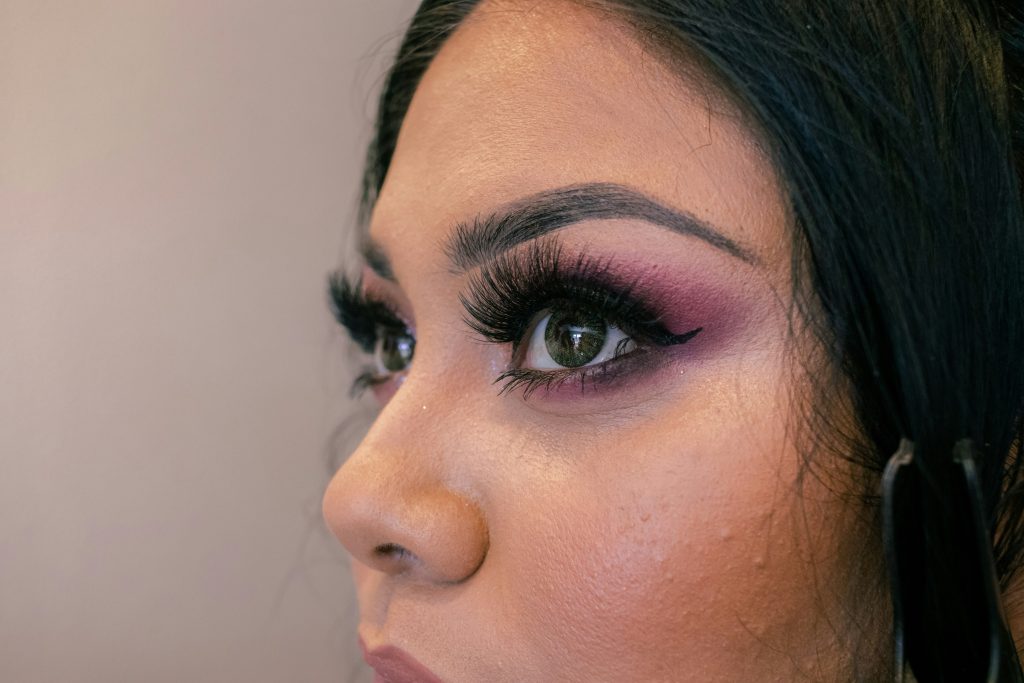
Let’s get brutally honest here—regular makeup can look disastrous under an HD lens. Why? Because these cameras pick up everything. Like, EVERYTHING. That concealer blob you missed blending? It’s glaring at you from the final photo. The glittery highlighter you swore would make you glow? Now it’s reading as disco-ball overload.
Take my story, for example. Once upon a time (okay, fine—it was last year), I applied what I thought was the perfect smokey eye for a professional shoot. Cue: major fail. The photographer zoomed in during editing and found chunks of eyeshadow fallout scattered across my cheeks like confetti gone rogue. Lesson learned: regular techniques don’t cut it when shooting for HD.
Here’s why HD demands more:
- Detail Magnification: Tiny flaws become glaring errors.
- Lighting Variations: Bright flashes can wash out or overexpose poorly matched foundation shades.
- Texture Highlights: Dry patches or uneven powder application scream “amateur.”
Step-by-Step Guide to HD-Friendly Makeup
Optimist You: *“I’ve got this!”* Grumpy Me: *“Ugh, fine—but only if coffee’s involved.”*
Step 1: Prep Your Canvas
Before diving into makeup, prep your skin for smoothness:
- Exfoliate gently to remove dead skin cells without irritation.
- Hydrate with a lightweight moisturizer. Avoid anything greasy because oil reflects light crazily on camera.
- Apply primer specifically formulated for HD photography. Look for keywords like “blur” or “soft focus.”
Step 2: Foundation Done Right
Use a foundation designed for HD photography—it’ll blur imperfections while keeping skin looking natural.
- Select one shade lighter than usual since flash tends to darken pigments.
- Blend, blend, BLEND! Harsh edges will haunt your Instagram forever.
Step 3: Conceal Strategically
Cover blemishes but keep it minimal elsewhere. Too much concealer under the eyes can settle into fine lines and give away your age—not cute.
Step 4: Perfect the Powder Game
Dusting setting powder all over might feel safe, but trust me—it’s risky business. Go sheer on areas where you want radiance (hello, cheekbones!) and heavier on zones prone to shine (like T-zone territory).
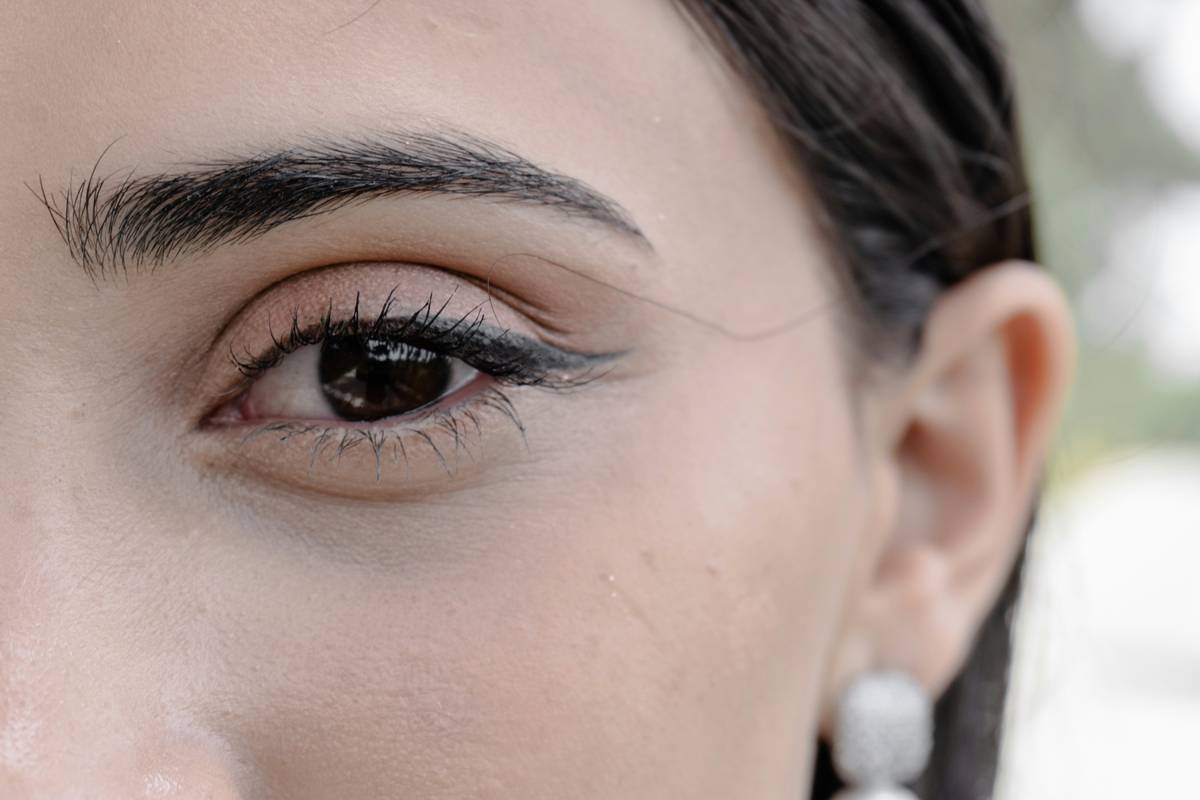
Step 5: Eyes That Pop
Mascara and eyeliner are essential, but proceed cautiously:
- Skip chunky formulas—they clump like nobody’s business on camera.
- Go matte for shadow unless sparkles are integral to the theme.
Pro Tips for Flawless Results
Tip #1: Less Is More
When in doubt, tone down intensity. What feels subtle IRL translates beautifully onscreen.
Tip #2: Match Undertones Perfectly
No matter how amazing your foundation color seems, mismatched undertones stick out like sore thumbs under HD scrutiny.
Tip #3: Avoid Terrible Tip Alert – Heavy Contouring
Whatever you do, don’t conturé like Kim K unless you want to channel raccoon vibes post-flash.
Tip #4: Set Spray = Lifesaver
A few spritzes of setting spray lock everything in place without caking further layers onto already-sensitive surfaces.
Case Studies and Examples
Let’s talk success stories, shall we?
Meet Sarah—a budding makeup artist whose portfolio skyrocketed after mastering makeup for HD photography. She credits her transformation to switching to airbrush foundation systems and ditching heavy cream-based blushes entirely. Clients rave about how naturally radiant they appear in portraits now.
Another gem? Jane Doe Cosmetics’ latest campaign showcasing models rocking nothing but glowing complexions caught attention worldwide—and guess what their secret weapon was? Yep, HD-specific primers loaded with smoothing properties.
FAQs About Makeup for HD Photography
Q: Can I use drugstore products for HD shoots?
A: Absolutely! Brands like L’Oreal TrueMatch Liquid Foundation or Maybelline FitMe Matte + Poreless are budget-friendly yet effective options.
Q: How far ahead should I test my routine before an actual shoot?
A: Aim for testing at least a week prior. This gives room for adjustments based on lighting setups unique to locations or studios.
Q: Do I need special brushes?
A: While not mandatory, investing in synthetic fiber brushes enhances control and prevents unnecessary shedding mid-session.
Q: Should I skip highlighting altogether?
A: Not necessarily. Opt for liquid or cream versions sparingly blended rather than piling powders which easily catch excessive shine.
Conclusion
To recap, acing makeup for HD photography boils down to thoughtful preparation, quality tools, and smart execution. Steer clear of bulky textures, ensure impeccable blending, and always set expectations realistically.
Now go forth and conquer those close-ups confidently—you’re ready!
“Blur the line between real and reel, one brushstroke at a time.” – Ain’t that poetic?
P.S.: If Tamagotchis taught responsibility through daily care routines, then think of mastering HD makeup artistry similarly… Consistency wins races 😉.